Subscribe for awesome emails

Enter your email address:

Delivered by FeedBurner

Showing posts with label crafts. Show all posts

Sunday, June 16, 2013

Father's Day breakfast and candy bar bouquet

For fathers day I usually like to play with different recipes and try something new. I guess you could say I use my husband as a guinea pig on his special day. He's never complained. This year I made him French toast roll ups and they were a big hit. I plan on making them again next weekend for the whole family to enjoy.


The recipe was super simple.
  • I took six pieces of buttermilk bread, cut off the crust, and pressed on them to flatten them out.
  • I then put nutella and banana slices on two of the bread, nutella and peanut butter on two of the bread, and nutella and strawberry jam on two of the bread. (get creative with fillings here)
  • I then rolled them up and slathered them with a French toast batter (any kind will due, I just used two eggs with 1/4 cup of milk)
  •  I then put a little butter in a frying pan and fried them on every side until evenly golden.
  • Once removed from the heat and cooled slightly I rolled them around in a sugar/cinnamon mixture.
  • Arrange on a plate and eat with syrup. No forks needed!
**I'm going to warn you, they look really gross throughout the process but once they are completed and ready for eating they will look delicious!


For one of the fun gifts I made a candy bar bouquet because after all, what man wants flowers? I was able to get everything I needed at the dollar store (score!) - the "manly vase", Styrofoam, candy, and TNT pop-its (no man can resist pop-its, it always brings out that inner child).


I thought this tin can would look more manly and rustic than a typical glass vase. Isn't it cute? I cut the Styrofoam to fit into the bottom, taped wooden skewers to the backs of the candy, and stuck them in. Easy-peasy and oh so fun!
ps... notice how I put a heart sticker over the "C" of the Chunky candy bar? I didn't want him to think I was calling him fat while giving him 2,000 calories of candy. "Hunky" was much more appropriate. hehe..
Pin It!

Spring / Summer Revirsible Craft

Another great craft kit found on groopdealz.com. All I had to do was paint and adhere scrapbook paper of my liking. Can it get any easier?


Pin It!

Sunday, February 3, 2013

Reversible craft

I got this cute reversible wooden craft kit from groopdealz.com (one of my favorite websites). It came with the wood block and vinyl letters. I painted the wood white and mod podged the scrapbook paper onto each block. Then of course added ribbon to give some pizzazz. I loved hitting two holidays with one project!


Pin It!

Saturday, January 19, 2013

Homemade bow holder

My sister is pregnant with her first girl and as one of her baby shower gifts I made her this bow holder. "E" for Elizabeth! 


This letter is from Hobby Loddy; scrapbook paper and ribbon is from Michaels. 

Another one I made found HERE

Pin It!

Saturday, March 17, 2012

First Initial Bow Holder

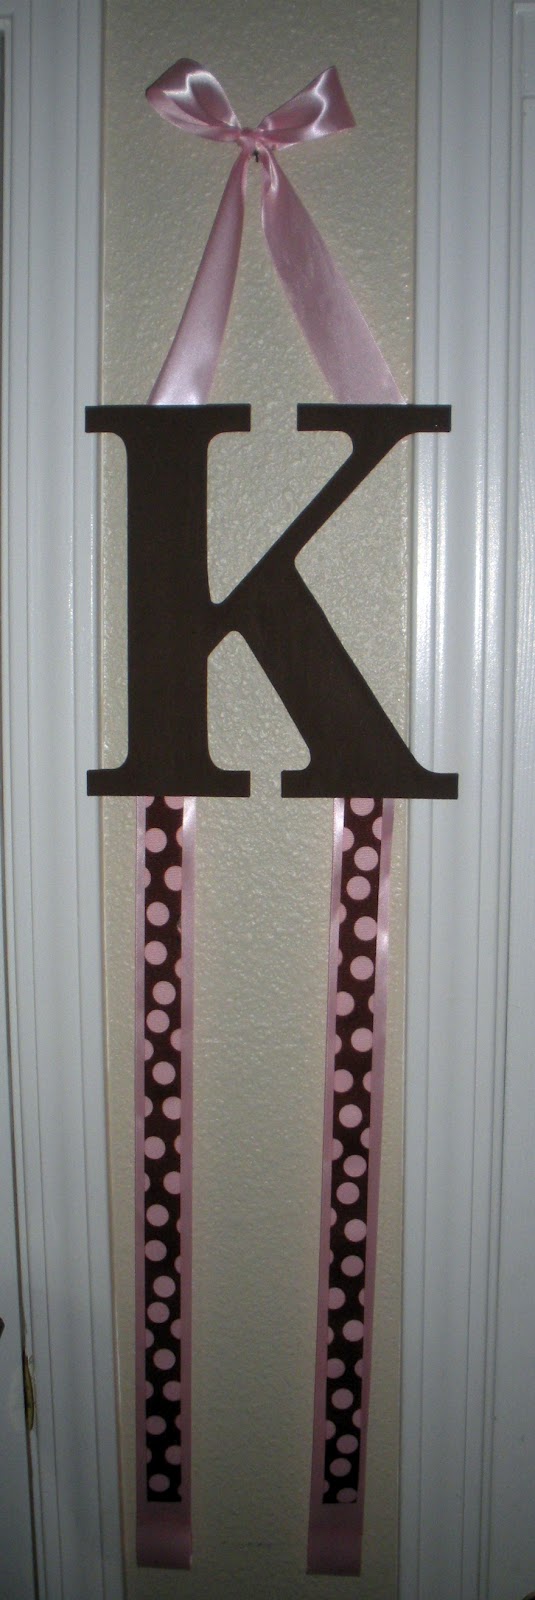
Here is the bow holder I made for my nieces first birthday. I painted a wooden "K" for Kyla then glued the ribbon on. I even looped the ends of the pink ribbon so she could hang headbands from it. 


The Princess 
Pin It!

Wednesday, January 18, 2012

I love you because...

I found this on pinterest and fell in love with the idea! What a perfect way to keep a marriage fresh and unique. 
The frame came from Marshall's for $7 and the pearls from Joann's for $1.50. I had everything else. Not a bad price tag for such a cute craft.  


I made these little rosette flowers out of an old t-shirt and embellished them with pearls. 

I also velcroed the pen to the back so it doesn't get misplaced. 

Before I even finished the project I came home from work one day to my first message from my hubby. So glad he's actually going to be using it! 

I couldn't find any scrapbook paper that I liked so just went with a solid slate blue. The nice thing is if I find some down the road it wouldn't be hard to just print a new sheet. 
Pin It!

Thursday, December 22, 2011

Homemade Snow Globes


We got the idea from Martha Stewart seen HERE. All you need for this project is:
- Mason Jar, baby food jar, or any jar really!
- Distilled water
- Glycerin
- Small figurines
- Large glitter
- Super glue
Directions: 
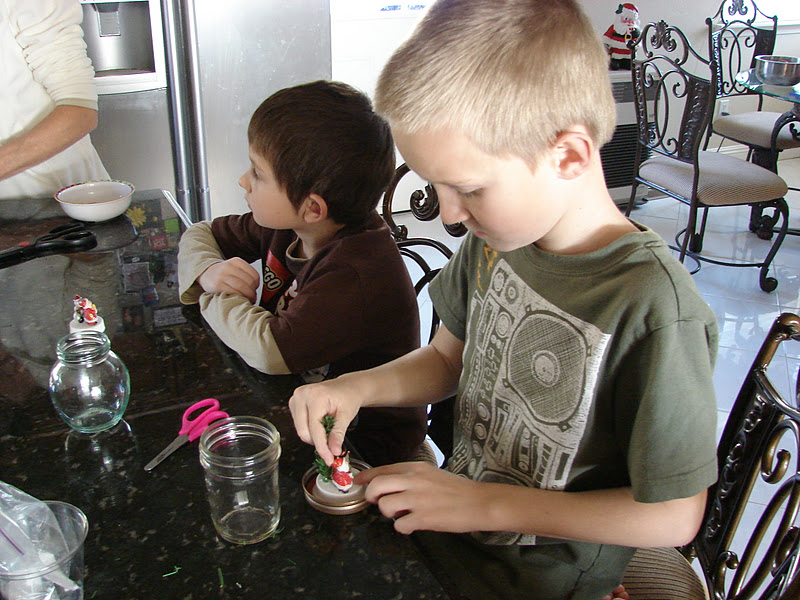
Glue the figurines to jar lid and let dry completely. Fill the jar up with distilled water, add a few drops of glycerin, and teaspoon of glitter. Lastly screw on the lid and you're done! You could super glue the lid closed but we decided not to in case something needs to be re-glued inside. The kids had a blast making this project and were extremely proud of the finished product. 


Pin It!

Tuesday, September 6, 2011

$5 find turned fabulous

I found this nightstand at a local thrift shop for only 5 bucks! Isn't she gorgeous? I walked by it several times and each time my eyes gravitated towards those curvy sides. I had to have it. 


I knew what I wanted to do from the moment I bought it. This required sanding the whole thing and sanding it bare on the top. The rest was just sanding enough to remove the varnish. 

I painted the body a creamy white. The paint color was called "Soft Brie". Isn't the top attractive naked? I think so. 

I wrapped the beautifully painted body with plastic then tackled the top. I applied a pre-stain conditioner then stained it with "Red Oak" stain. 

Lastly I applied the varnish and let it set. My final touch was adding new hardware from the Martha Stewart collection at Home Depot. 


I find this piece to be very attractive and can't wait to make a matching dresser. 
Can you say drab-to-fab? I can. ;) 
Pin It!

Sunday, September 4, 2011

Spray paint obsession

Deke and I have a new obsession - spray paint. Its amazing how much easy and faster projects are with a spray can! Here is one of our latest projects - yes we did it together. After all, the couple that crafts together stays together :) 

Deke found this piano and although its cute it really lacked spunk. 

So we taped it up.... 

Spray painted it turquoise... 

And added plexiglass to the top so the kids can see the keys jump.

We're really happy with our results and I think it got the spunk I was looking for. 

Pin It!

Saturday, February 19, 2011

His and Her pillows

Burlap pillows seem to be all the craze these days. Not sure why since you really can't lay on them but they are kinda cute. I've seen them at different stores like Pottery Barn, Ethan Allen, and other boutiques. Their price - $60 to $90 EACH! I have NO idea who would spend that kind of money on burlap, especially when the design is so simple. I was very pleased when I found a tutorial on THIS blog and it was beyond easy. 

I made my pillows 18 inches and used the Harrington font for the letters. A very helpful hint is to apply "Fray Check" around the entire pillow to avoid shredding, burlap tends to shred a lot once its cut! Also, the best part about this project - no sewing! I smeared some liquid stitch around the edges and voila - knock off designer pillows! (and for under $5!)

Now there will be no mistake who sleeps on what side of the bed ;) 

Pin It!

Sunday, February 6, 2011

My Mini Valentine

This weekend Deke worked at the fire department and since I don't have Tyler next weekend I decided to have my Valentine's with him early. I asked Tyler a few weeks ago if he'd be my mini Valentine (I ask him every year) and to my delight he said yes. My husband is of course my true Valentine but just look at this kid.... I mean, can you blame me? THIS lady just ♥'s him!


We started off by making heart shaped sugar cookies and decorating them with mountains of sprinkles and chocolate chips.
I had more pictures of him and his cousin Jonathan making the cookies but realized that I didn't have my memory card IN my camera. I hate when that happens.
Then he made this cute little heart shaped wreath. We love wreaths in this house.

Ok, he was SO done with me taking pictures of him. lol
Here are the delicious cookies!
This wasn't part of the Valentine's fun but I thought it was too pretty not to share. This is the candy bar pizza I made for the super bowl. I made one for us and another for the firemen. I love any excuse to visit Deke when he's on duty... hehe...HERE is the recipe!
♥♥♥♥♥♥♥♥♥♥♥♥♥♥♥♥♥♥♥♥♥♥♥♥♥♥♥♥♥♥♥♥♥♥♥♥♥♥♥♥♥
Pin It!

Saturday, February 5, 2011

Valentine's Day Craft

I found this adorable heart wreath on The Idea Room website and thought I'd create one of my own. I cut out 276 three inch round pieces of felt (no I didn't count them, I just did the math), folded them twice, and then pinned them onto a heart shaped foam wreath.
This project was VERY time consuming so I ended up doing it at work on my breaks as well as a home when I should of been sleeping. But needless to say, I am very pleased with the results.


Here are the materials

I bought a few different packages of pins before I found the ones that worked. Save yourself the trouble and buy these!

After folding it twice stick the pin through the bottom like so and then push into the wreath.

Here is the wreath part way completed. Notice I placed the felt closer together than shown in the original tutorial. Once I realized that I felt I was too committed to turn back so I just went with it! I still like the way it turned out though :)


Pin It!
Related Posts Plugin for WordPress, Blogger...